|
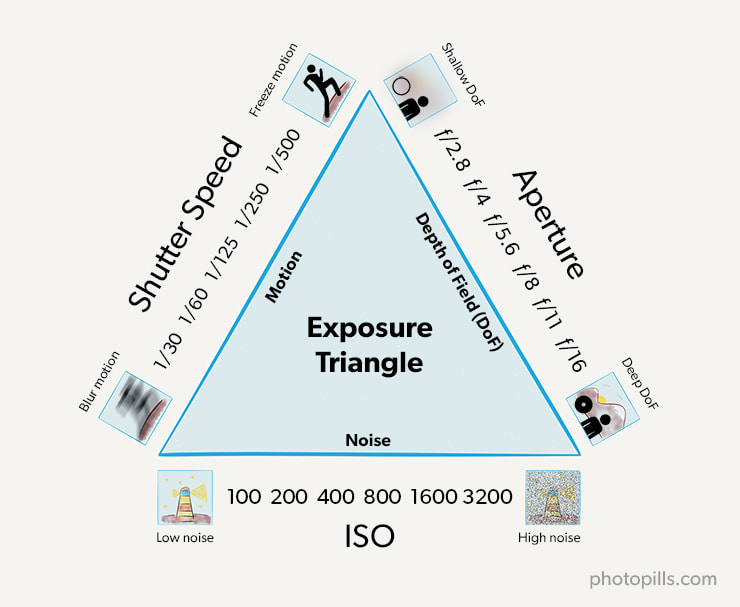
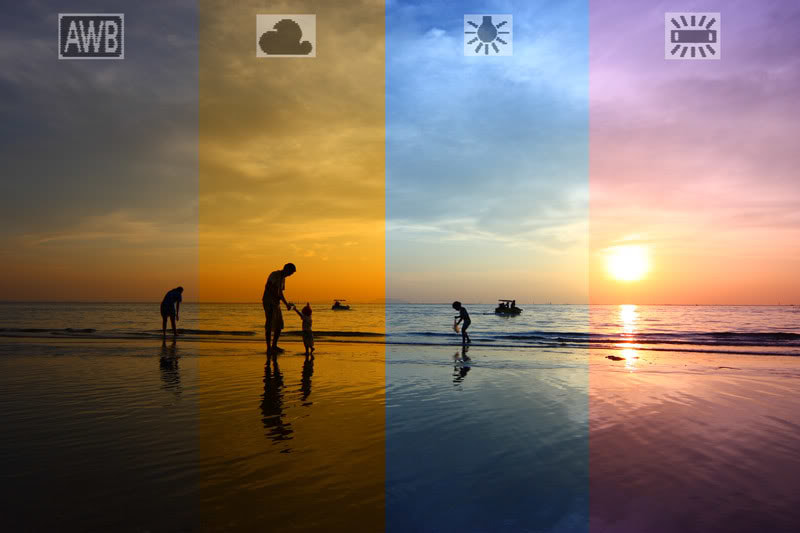
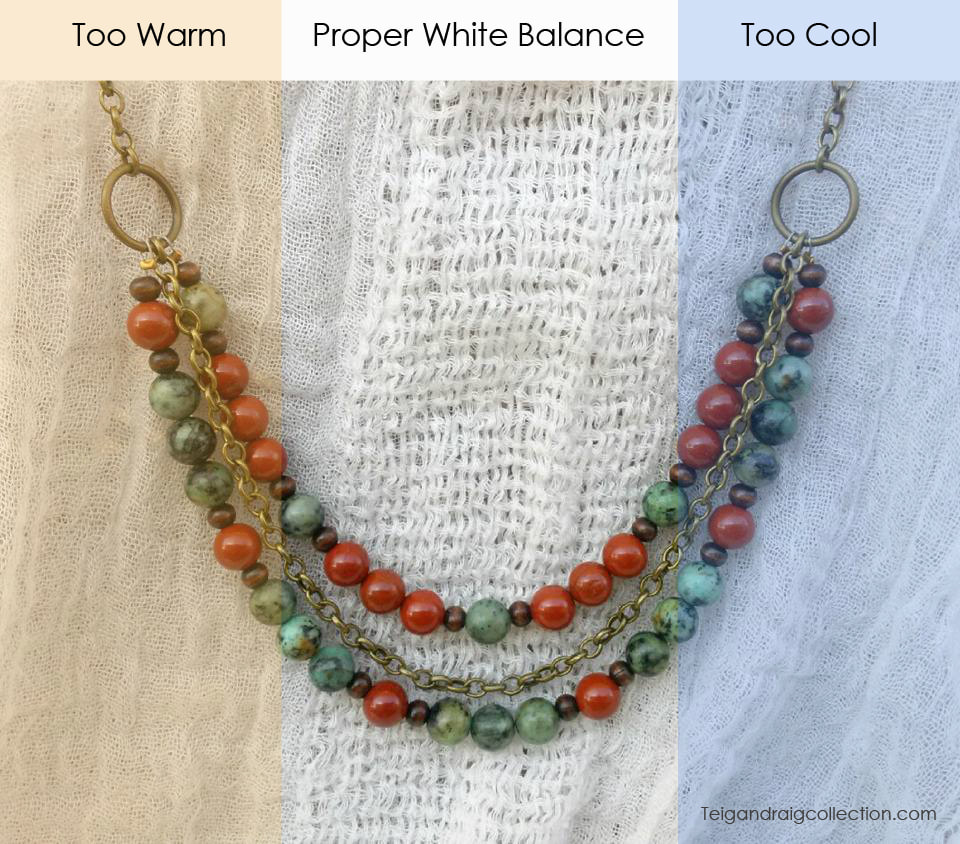
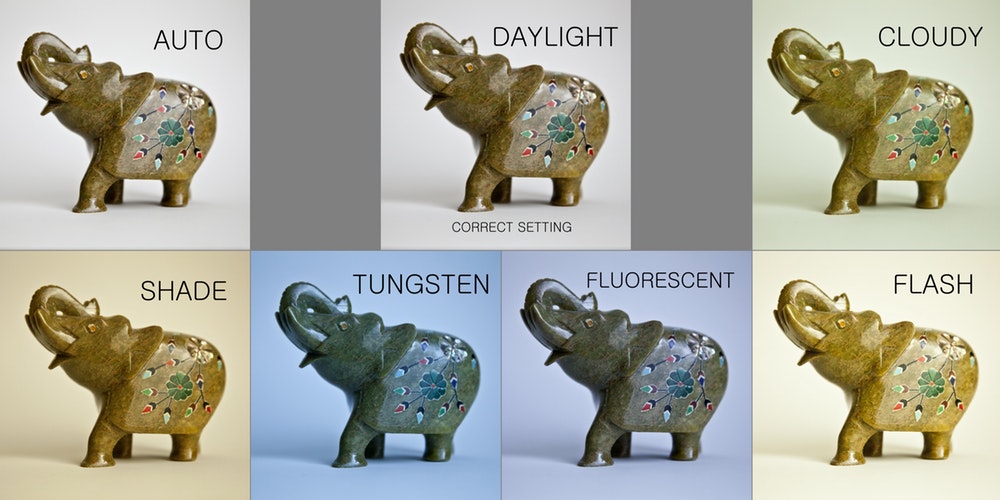
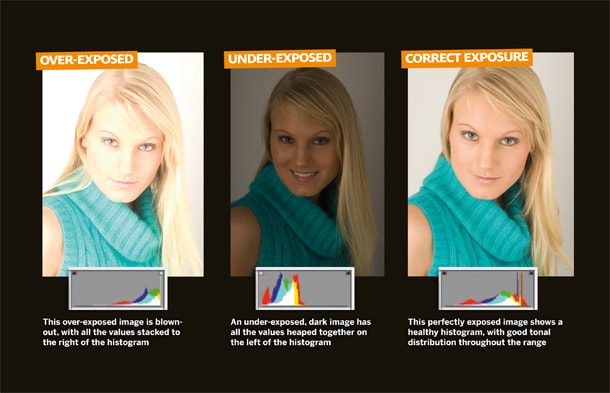
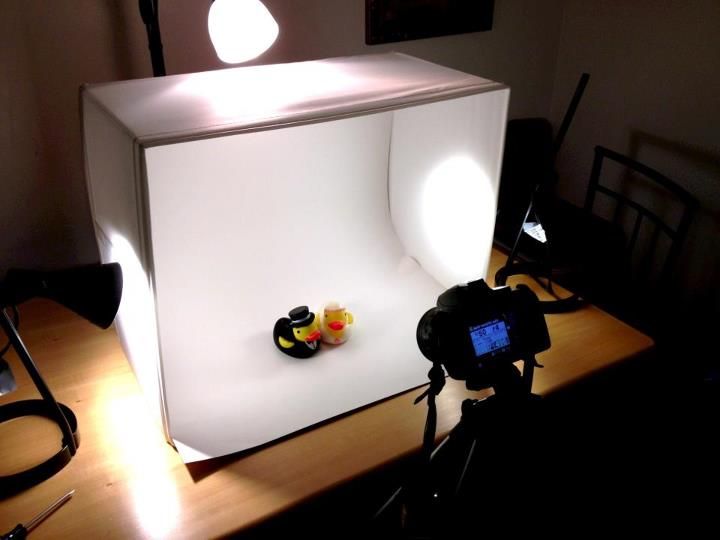
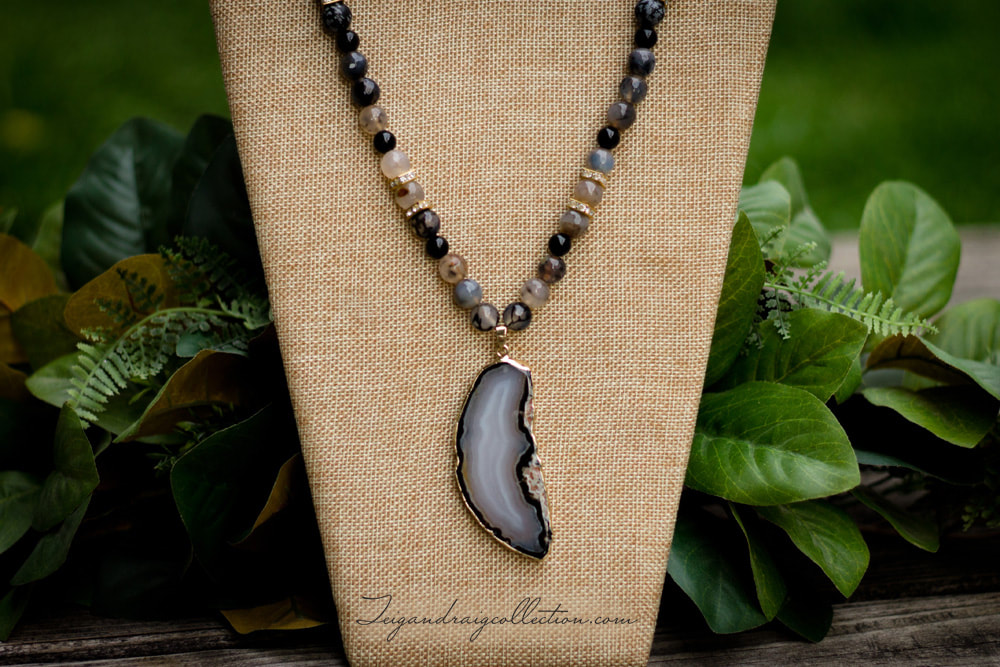
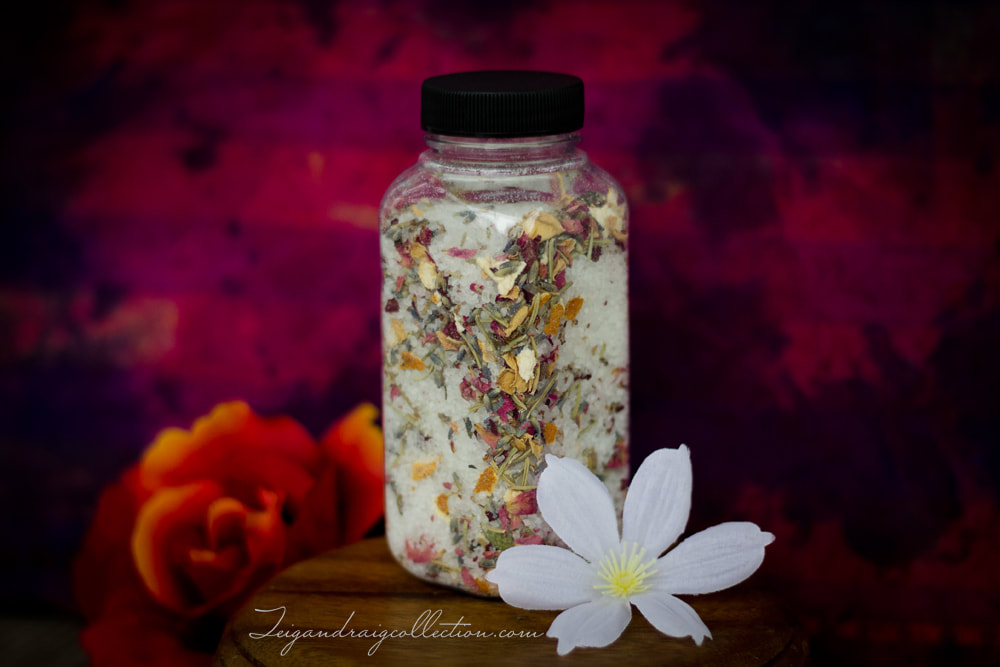
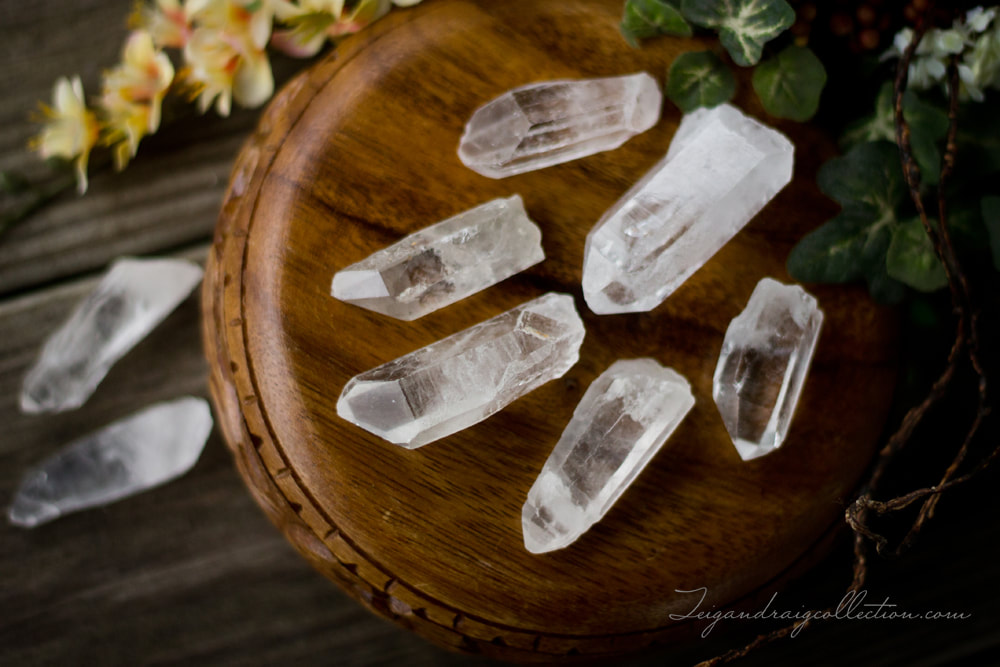
In an already saturated online market, you need to put your best foot forward. When shoppers visit your online shop or store, the product photos will determine the shopper's first impression of your product, your brand, and the quality of the products and services you offer. Ah yes, that carries a certain amount of weight to it, now doesn't it? When shopping online, you don't get to touch the product, or view it in person. You have to rely on the photos and product description to tell you everything you need to know about the item. You count on that item being accurately represented in the photos you are viewing and in the description you are reading. This is why good product photography is of great importance when selling anywhere online. 3 Common Mistakes That Ruin Product Photography Many of you know that I make handmade jewelry and herbal skin care products, but what you may not know is that I am also a professional photographer. I attended Savannah College of Art and Design majoring in photography. Photography is a huge part of my life and it is important to me to produce photos that accurately represent the items I make and sell. As an online seller, 90% of my marketing and selling is done online. Like many online sellers, I use social media to market and sell my products. I also maintain several websites on which to sell my products and services. Facebook and Instagram are the main social media outlets I use to market and sell. I come across countless posts from fellow sellers who are also using social media to market and sell their goods and/or beautiful creations. I have noticed 3 common mistakes many sellers are making when photographing their products for sale online: images that are out of focus (blurry), improper white balance (do not show correct color), and images that are under exposed or over exposed (too dark or too light). These are all too common mistakes that are easily fixed with a bit of basic photography education. You don't need an expensive interchangeable lens DSLR camera to take great product photos. A good point and shoot camera can get the job done nicely. It's even possible to get decent photos with a good cell phone, although I do recommend a using a good camera for best results. Achieving Proper Focus - Don't Be Just A Blur  Clear, sharp images best showcase any product. Images that are blurry are unattractive, and do not clearly show the details of the subject. Many focus issues are caused by camera shake when hand holding the camera. Some focus issues are caused by incorrect aperture (shallow depth of field), but the subject of aperture is a bit more complicated than what I want to discuss in this article. Let's start with camera shake, as it is usually the issue and is the easiest to fix without more in depth knowledge of photography. Camera shake is movement of the camera when the shutter button is pressed, most often caused by unsteady hands and improper body position. The best way to fix this is to shoot with a tripod. There are many small inexpensive tripods available on the market today. A quick Google search brings up many results. You can even find tripods for use with cell phones. A tripod greatly eliminates camera shake by holding the camera securely so the camera does not shake or move when the shutter is pressed. It is not impossible to get clear in focus images when hand holding the camera. Body position, camera holding technique, and having a steady hand all help one achieve proper focus when shooting hand-held. Hold the camera in both hands and look through the view finder rather than using the screen on the back of the camera. Hold your elbows close to your sides and lean or prop yourself on something to help keep a stable position while moving as little as possible. This allows you to use your body and correct hand position to keep the camera steady when the shutter button is pressed. Many photographers, myself included, hold their breath the moment the shutter is pressed to even further reduce movement of the camera. Shooting with a higher shutter speed also helps prevent out of focus images. A higher shutter speed allows for more stop motion by increasing the speed at which the curtains close when the shutter button is pressed. A study of how the camera works and the exposure triangle would be of benefit here, but that is a topic for another time. I don't want to induce information overload, so for now, I'm keeping things simple. Below is a graphic that shows a simplified outline of the exposure triangle for those who may be curious. White Balance - Achieving Correct Color The main culprit of incorrect color in photographs is improper white balance. Improper white balance can actually change the color of a photograph and make the color of the subject being photographed appear different than it really is. 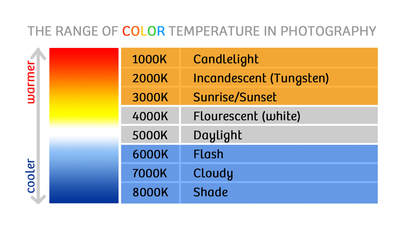 The temperature of light is measured by the Kelvin scale. The light in a shaded area or on a cloudy day is blue, or what is considered cooler in temperature. Daylight is white and is considered neutral or natural. Sunset, sunrise and tungsten light is yellow, orange, or red, or what is considered warmer in temperature. Many point and shoot cameras have a setting called AWB which stands for auto white balance. AWB means that the camera evaluates the available light and determines what color temperature to capture the image in. The problem is that many times the camera gets it wrong and accurate color is not achieved. When shooting outdoors in cloudy or overcast conditions, use the white balance setting represented by the shape of a cloud. This setting can also be used if shooting in shade if your camera does not have a separate setting for shade. When shooting outdoors in full sun, use the daylight setting. If shooting indoors under tungsten or incandescent light, use the tungsten or light bulb setting. If shooting under fluorescent light, use the fluorescent or radiating rectangle setting. See image below. If using the flash, use the setting for flash. Most cameras all use the same symbols to represent the white balance settings, but you may need to consult your camera owner's manual find out your camera's white balance symbolism. Controlling Light - Achieving Proper Exposure 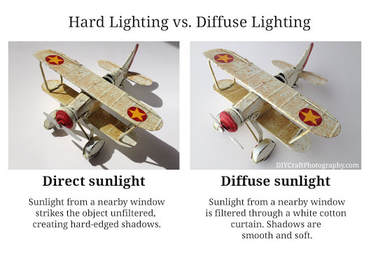 Proper exposure is governed by the exposure triangle, but as I mentioned earlier, I want to keep this relatively easy to follow and understand. I know many of my target audience are not using cameras with manual settings, or they just prefer to shoot in auto mode. A very simplified explanation of exposure issues is an image that is either too dark, or too light. See the image above for a break down of each. A properly exposed image allows the perfect amount of light in through the lens to reach the camera's sensor. It is well lit and not too dark and not blown out. A blown out image has highlight areas that are white or near white and lack detail because too much light was allowed to enter the lens and wash these highlight areas out. A blown out image can sometimes be caused by the use of flash when flash was not actually needed, the flash was too bright, or the camera was too close to the subject when flash was used. Using a flash to light a set up creates harsh shadows in the image which takes away from the aesthetic of the image. Bright diffused lighting is best. Diffused lighting is the same principle as the clouds diffusing the sun's light on a cloudy day. The light on a cloudy day is soft and produces muted shadows. Using a lightbox is a great way to properly light your set up and achieve a nice soft lighting. Proper lighting is crucial to achieving correct exposure. To avoid under exposure, make sure your subject is well lit. Using a light box or shooting outdoors in natural light can help with this. You can purchase a small light box or make one yourself. Making one is actually quick simple. Here is a simple tutorial on how to make a homemade light box. HOW TO MAKE A LIGHTBOX Editorial Photography vs Product Photography Part of the fun of doing your own product photography is that you are in control of your style. It is up to you how you present your products. Some people prefer product photography that is clean and simple with products displayed against a white background with no props or other elements. This is called standard product photography. Then there are people, myself included, who prefer a more editorial approach to product photography. Editorial photography is a more artistic approach to product photography with the use of props and interesting background while still placing the focus on the product. The three photos below are examples of editorial product photography. There are some differing schools of thought when it comes to what style of product photography is best. I feel this is a personal decision. Standard product photography is simpler and less complicated to produce. Editorial photography is more time consuming, but allows you to be creative with how you present your products. As an artist first, I choose to use an editorial style photography to represent my products and my brand. When using an editorial approach to product photography, you must take care that your images do not not become cluttered and distracting with too many props and busy complicated backgrounds. What ever style you decide, just have fun with your photography. Keep your focus on the products you are photographing and you will do great! I hope you have enjoyed this article and found it helpful in producing better product photography.
Brightest blessings! Teigan Draig |
AuthorTeigan Draig : Seeker of light, dragon tamer, woodland wanderer, butterfly queen, crystal collector, and matron to her young prince. Archives
July 2023
Categories
All
|
 RSS Feed